Monday, September 9, 2013

Italian Plum Custard Pie on Hazelnut Crust

The bad news: this month has been really, really hard. the good news: I can make pie. Lots and lots of pie. Some people deal with their struggles by going to church, running for miles on end, or cleaning their houses from top to bottom. Me, I like to make pies. I'm a lucky person. I live where produce is abundant, and I have in-laws with the most beautiful Italian plum tree that they graciously allow me to pick when the fruit is ripe. I love it. 


Climbing up their ladder to pick the top of the tree (I don't have to, but I like to) reminds me of picking cherries in 7th grade with my sister when we hadn't lived in Washington long. It was a grind at the time--seriously early mornings--I was terrible at it, I was lazy, and didn't do it long at all--but we really did have fun.  I picked that plum tree last week and brought the bag home and did nothing but look at it for days. I felt sad. I made some chutney and canned a whole gaggle of jars. I still felt sad. And then I made this pie, which made me feel a little better. I think I'll have some more tonight and feel even better. Got a little time? You might take a crack at it, your heart might just feel a little lighter like mine did.

Italian Plum Custard Pie on Hazelnut Crust

Ingredients:
Crust & Topping
1/2 C hazelnuts, shelled
1/2 C brown sugar
1/2 tsp nutmeg
1/2 tsp salt
1 1/4 C all purpose flour
3/4 C unsalted butter, chilled and cut into domino-sized chunks

Filling
1 lb. Italian plums, pitted and quartered
1/4 C granulated sugar
2 T all purpose flour
1/4 C heavy cream
1/4 C whole milk
2 eggs
1 tsp vanilla
1/2 tsp salt

Preheat oven to 350 degrees. Place a heavy sauce pan on a burner over medium heat. Add the hazelnuts. 

Shake the pan back and forth every few minutes for around 5 minutes, or until the hulls begin to come off, and they begin to smell delicious. Remove from the heat and allow to cool until you can handle the hazelnuts without burning yourself. 
This will take around 10 minutes. Remove all the hulls and add to a bowl of a food processor. Combine with all dry ingredients and pulse a couple times. Add the butter, a few pieces at a time and pulsing until the dough looks crumbly, but combined. 
Take about 1 1/2 C of the mixture and press into a pie plate. 
Place in the oven and bake for 15 minutes. Remove from the oven and set aside to cool.

Rinse, pit and quarter the plums. 
 
Pour into the cooled pie shell. Combine remaining filling ingredients and whisk together. 
Pour over the plums in the shell. Top with remaining crumble mixture. There may be some extra depending on how thick you made your pie crust. 
Place on a baking sheet and bake for 55 minutes.


Saturday, September 7, 2013

Pizza for 4


Late summer/early Fall is peak season for tomatoes and basil-perfect fodder for homemade pizza.It's also time for wild mushrooms such as chanterelles, corals, lion's manes and boletes to start poking out, also great pizza fixin's. No access to wild mushrooms? Don't give it a second thought. Use what you have--that is precisely the point.

Ingredients:
Pizza Crust
2 tsp dry active yeast
2 tsp honey
1 1/2 C whole wheat flour
1 1/2 C all purpose flour
2 tsp salt
1 1/4 C warm water

Wild Mushroom Pizza Toppings:
1 pound wild mushrooms, cleaned and sliced (if you can't find wild mushrooms, feel free to use what you have)
1/4 lb. Manchego cheese, torn into chunks
2 tsp Aleppo pepper--1 tsp per pizza (No Aleppo pepper? Substitute cayenne and decrease amount by half)
1 fresh sage leaf
1 tsp truffle salt
1/2 large onion, diced
2 T unsalted butter
2 T Extra virgin olive oil

Tomato Capicola Pizza Toppings:
1 lg. tomato, cut into 1/2-inch slices
1/4 lb fresh mozzarella, cut into 1/2-inch slices
6 pieces Capicola, cut into paper-thin slices (No capicola? Just substitute pepperoni or salami)
2 T extra virgin olive oil
2 garlic cloves, minced
1 C fresh basil, torn or shredded for topping

2 T extra virgin olive oil and corn meal each, for prepping baking sheets
4 T extra virgin olive oil--1 T per pizza
2 T extra virgin olive oil for bowl for dough proofing

About 3 hours before you want to eat, add yeast and honey to 1/4 C warm water to make a sponge. Stir and cover with a towel. Leave for 15 minutes until foamy. 
Mix flours and salt in a large bowl. 
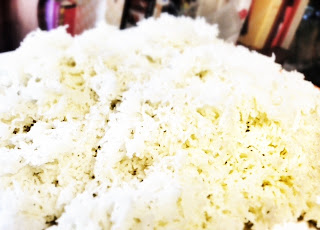
Create a well in the center. Add remaining warm water to the sponge. Pour into the well in the flour. Stir with a fork to combine roughly. Rub a little oil on your hands and knead the dough into a pliable ball of dough. This should take about 5 minutes. Coat a large bowl with olive oil. Place the dough into the bowl and cover tightly with plastic wrap. Place into the oven until the dough is at least doubled. This should take around 3 hours.
While the dough is rising, prepare toppings for the mushroom pizza. Heat a saute pan over medium heat. Add the butter until melted. Add the onions and stir often until they are amber colored. 
Remove to a bowl. Mince the fresh sage. Return the pan to the stove. Heat the olive oil. Add the mushrooms and sage. 

Season with truffle salt. Cook, stirring periodically until all liquid has cooked out. This will take around 15 minutes. Cook until slightly browned. Remove to a bowl. Next, prepare toppings for the tomato capicola pizza. Slice tomatoes and set aside. Prep basil and cheeses. 
When the dough is ready, remove the bowl of dough from the oven. Heat oven to 450 degrees. Punch down the dough and recover with the plastic while you prep the baking sheets. Oil each sheet and sprinkle with corn meal (this helps the dough not to stick.) Cut the dough into 4 pieces. Press each piece into a round as thin as you can make it. Coat each crust with oil. 

For the two mushroom pizzas, add the mushrooms first, followed by the onions, and pepper. Top with the Manchego. For the two remaining pizzas, add the cheese, tomato slices and capicola. Sprinkle the garlic over the top. 

Bake the pizzas for 8 minutes. Switch the heat to broil. Broil for 2 minutes and remove from the oven. Allow to rest for 5 minutes before cutting. Top the tomato pizzas with the fresh basil. Enjoy!


Tuesday, September 3, 2013

Watermelon Feta Salad

Summer is literally blowing by--I can see it right outside my window. Leaves aren't turning quite yet, but the breeze is picking up and leaves are looking crispy. It's time to take stock of an outstanding season and eat the full-tilt summer foods like mad before they're gone. In my mind, watermelon and tomatoes are two foods that just should only be eaten fresh when in season. What you find in the market off-season are sad, mealy, flavor-free impersonators that should be avoided. Watermelon, also like the tomato, is a good delivery system for lots of flavors and textures, which is why I love it in salad, particularly when lots of other great goodies are in season too, like fresh local feta (bet you didn't think I was going to say cheese, did you?) It's sad to think we won't see them again for another year, but I suppose that's part of what makes them so delicious. I love this salad for lunch with some toasted naan and Baba Ghanouj

Watermelon Feta Salad
Ingredients:
1 watermelon, seeded and cubed into chunks no larger than 1-inch
1 C basil leaves, torn
8 oz. feta
1 medium red onion, chopped coarsely
1/4 C white balsamic vinegar
1/4 C extra virgin olive oil
2 fresh red chiles (I used Thai chiles, but you could use cayenne or dried Aleppo Peppers)
Salt to taste

Mix the dressing by combining the vinegar, oil and minced chiles. 
Combine all remaining ingredients in a large bowl and gently combine with the dressing. Season with salt to taste. Enjoy!


Friday, August 16, 2013

Super Easy Pasta Sauce

I don't know about you, but I cannot stand to buy pasta sauce when you look at the ingredients list and find things like corn syrup, sugar, "natural flavorings", and soybean oil. The price doesn't bother me, but the weird ingredients and sad flavor do. Sooo, when I started my wee little garden a couple years ago, growing tomatoes became serious business. Each year I've started seedlings for paste tomatoes, cherry tomatoes and heirloom varieties. The paste tomatoes are an absolute must I learned, because without them the sauce is more like soup, and after boiling the soupy sauce down, the fresh flavor is cooked out and replaced with something pretty acidic and bitter (which is probably why commercial sauce relies on the addition of sweeteners and "natural flavorings.") 

Every year I try to grow paste tomatoes, and each year so far, I have failed, winding up buying the pretty, pear-shaped beauties from local growers. Thankfully I've been buying from them long enough that I can get a really fair price. Cherry and heirloom tomatoes are also essential because both offer their own huge, fruity, tomato-y flavor that paste tomatoes don't provide. These guys have been pretty simple to grow, with each plant delivering tons of produce. Don't worry though, you really don't have to grow these if you aren't so inclined. Hop down to your favorite produce market (I love our local Farmhouse Table Store) or your local farmer's market (I'm also a big fan of ours) to pick up what you need. This recipe is just for simple tomato sauce (Pomodoro), but you could certainly add seasonings, herbs, etc. when you serve fresh. (I don't can mine with lots of extras because I like to avoid pressure canning when possible for no reason other than pure laziness.)

Super Easy Pasta Sauce
Ingredients:
10 pounds paste tomatoes, halved
5 pounds cherry tomatoes (I use Sun Gold and Sweet 100's)
5 pounds heirloom tomatoes, quartered (I use a mixture of Black Krim, Cherokee Purple, Mr. Stripeys and Brandywines)
1/4 C extra virgin olive oil
6 T lemon juice*
3 tsp salt*

*these are only needed if you are going to can your sauce up. If not, the sauce can be served immediately, as-is, or with the seasonings and additions of your choice.

Preheat oven to 325 degrees. Take two large baking sheets and add half of the olive oil to each sheet. Divide the tomatoes evenly among the sheets and place into the oven. 
 
Walk away and find something else to do. Come back in 2 hours and rotate the cookie sheets. Walk away again. In another 2 hours, remove the baking sheets from the oven. The tomatoes should look slightly charred around the edges, with little to liquid remaining. 
Run the mixture through a food mill to create a thick sauce. 
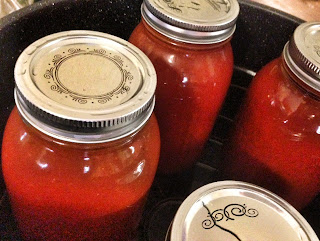
If you are canning, fill sterilized quart jars with the sauce, 2 T of lemon juice and 1 tsp of salt, leaving 1/2-inch of head space at the top. This should yield 3 quart jars, depending on your tomatoes. Process in a boiling water canner for 40 minutes.

Wednesday, August 14, 2013

Fat Girl B.L.T.

Anybody who knows me at all knows that any knowledge I have rattling around upstairs is purely due to being raised in part by my grandparents. When it came to food, my Grandpa taught me to appreciate the beauty of a good stack of pancakes with tons of butter and preferably, a solid selection of "real syrups" to choose from--maple, boysenberry, blueberry, apricot--you get my drift. My Grandma taught me to appreciate the beauty of fresh foods prepared simply--the things that she and Grandpa could grow in their garden, trees and bushes. My sisters and brother spent a lot of quality time pilfering the raspberries, and snatching pickles from the basement whenever possible. Seriously, those pickles were insane and I can still taste them. Together, my Grandpa and Grandma raised us right during the time they had. They taught us to savor life--not making ourselves go without, but not being a glutton either. Moderation was the ticket.  How does this connect with a sandwich called the Fat Girl? Sometimes only the richest, most insanely perfect, tomato, cheese and bacon packed meal will do. I appreciated every single bite of this beauty. Even the parts that ran to my elbows. The moderation part comes in when you only each one at a time, and probably, only one per week...

Fat Girl B.L.T.
Ingredients per person/sandwich
3 slices thick-cut, pepper bacon
2 slices fresh, thickly sliced heirloom tomatoes
2 slices double-cream brie
1/4 C of shredded iceberg lettuce
1 T fresh basil, cut into thin strips
1 thick slice Hawaiian round bread, cut in half
1 tsp balsamic vinegar
1 T mayonnaise
Salt and pepper 

Place the bacon on a baking sheet. 
Place into a cold oven. Turn heat up to 350. Check the bacon in 7 minutes. Turn each slice over and rotate the pan. Cook for another 7 minutes or until the pieces are crispy. Remove from the heat and place on a paper towel.

Slice the tomatoes, lettuce, basil and cheese.
Toast the bread as dark as you can stand it without burning. The toasting is important as it will help the bread attempt to stand up to all the juices in the tomato. (Really, this bread does not stand up to the juices at all, but it's really, really good. If don't want your bread to essentially fall apart while tasting delicious, you'll probably want to opt for a traditional baguette with lots of crust.) Spread the mayo on each slice, add the tomato and season with salt and pepper and vinegar. Sprinkle with the basil and lettuce. Top with bacon, then the cheese and the remaining piece of toast.

Disclaimer: This is NOT a neat meal and you will most definitely have crumbs all over your face and hands. You will likely experience tectonic shifting of tomatoes and lettuce, and you will certainly have tomato juice running down your arms. That said, it is really, really delicious. Happy lunching!

Monday, August 12, 2013

Potato Gnocchi with Wild Mushrooms, Prosciutto and Kale

Yesterday I had very high hopes for hiking, but with thunderheads on the horizon and the threat of more flooding, I thought better of it. After moving through the 12 stages of grief after a full weekend with no time in the shade of pine trees or alpine lakes to take photos of, I opted for the next best thing in my view, a nice heartwarming, belly-filling plate of Italian food. Initially my thought was ravioli, but honestly, I just got lazy and didn't feel like putting the time in, so gnocchi was the next best thing. I have kale growing in absurd abundance, I have shallots from my friends at Flicker Farms, and morels that we picked this Spring and dehydrated--all of these being the makings of a fine white wine and cream sauce for little potato dumplings. It isn't a fast recipe (which is why I made it when I had some time open up) but I think it's worth the time--it was rich and delicious and made spending the afternoon indoors a worthwhile endeavor. Give it a whirl--your tummy will thank you!

Potato Gnocchi with Wild Mushrooms, Prosciutto and Kale
Gnocchi
3 large baking potatoes
1 tsp truffle salt
1 egg
1/4 C grated Parmesan
1/4 tsp fresh grated nutmeg
1 1/2 C all purpose flour plus 1/4 C for dusting

Sauce
2 T butter
3/4 C white wine
1/2 C heavy cream
1 bunch of kale, stems removed
1 C dried morel mushrooms (or other wild mushrooms)
1/4 C chopped prosciutto
2 shallots, minced
1/4 C grated Parmesan

Put potatoes whole, skin-on into a large stockpot of salted, cold water. Bring to a boil, cover, and simmer for 45 minutes undisturbed. Meanwhile, prep your remaining ingredients for the gnocchi (grate the cheese and measure out the flour.) Then, prep your sauce ingredients: wash and stem the kale. Place kale into a large pot of salted boiling water. Simmer for 3 minutes, strain into a colander under cold running water to stop the cooking and keep the leaves bright green. Squeeze out any remaining liquid, roughly chop and set aside. Rehydrate the mushrooms by placing into a medium-sized bowl of fresh water. This  will take about 30 minutes. Chop the prosciutto and set aside. Mince the shallots, grate the Parmesan and set aside.

Remove the potatoes from the boiling water and allow to cool just enough so that you can handle them without burning yourself-they should still be as hot as you can handle though. Remove the skins by sliding them off and using a paring knife if necessary. Cut away any bruises or blemishes. Cut each potato into thirds and place into a food mill or ricer, scattering the potato "shreds" onto a cutting board or large work surface. Allow the milled potatoes to cool completely. 

Begin to build your sauce. Warm the butter in a large saute pan until melted over low heat. Add the shallots and stir periodically until they are brown. Meanwhile, wash the large stockpot that you used to boil the potatoes, fill it with more salted water and set to medium high. 

Begin to make the gnocchi by scattering the potato shreds into a large bowl. Create a well in the center like you would to make pasta. Add the egg, truffle salt and cheese; whip together with a fork until all of the potato is incorporated. Then add the flour, treating the dough as you would a good biscuit recipe--combine carefully, paying close attention that you just bring the dough together without overworking. The gnocchi should be light and pillowy, not tough and chewy.
Cut the dough into 8 pieces using a bench scraper. Flour your work surface and hands, and roll each piece into an even rope, approximately an inch wide. Again, using the scraper, cut the gnocchi into evenly sized pieces, about 3/4 inch. Set aside.
Moving back to the sauce, once the shallots are evenly browned, add the chopped prosciutto for about 5 minutes, or until the pieces are well browned and the fat has rendered off. Bump the heat up to medium, and add the mushrooms, sauteing for approximately 10 minutes until nearly all of the liquid has cooked off and brown bits are forming on the bottom of the pan. Add the wine and reduce the heat to low again.
Return to the gnocchi, and begin adding them to the boiling water--cook in batches, about 20 at a time so they cook evenly without sticking together. Once they begin to float in the water, cook for another minute and then remove with a slotted spoon and add to the sauce. This is a fairly quick process-- probably around 6-8 minutes for all of the gnocchi to hit the pan. Stir the dumplings gently so as not to break or nick them. Add the cream and some of the cooking water from the gnocchi as needed to thin the sauce out to the consistency you want. I don't like a very thick sauce, so I added around 1/2 C of the cooking liquid. Add the kale. 
Again, gently combine. Taste and season with remaining truffle salt. Serve immediately, topped with grated Parmesan. As a one-dish dinner, this recipe serves four.


Thursday, August 8, 2013

Grilled Summer Dinner Salad

Last night when I made this dish my iphone said it was 103 degrees outside. When it's that hot out, you don't want to sweat over the stove and you certainly don't want a hot and heavy meal. With tomatoes coming off now in droves, peaches abundant, fresh local goat cheese still available and one last fillet of salmon still in the freezer, I decided to toss it all together into one tasty dinner salad. There are a few components to make, but all in all, this was a quick, easy meal that packed a whole lot of flavor.

Grilled Summer Dinner Salad
1 wild Alaskan salmon fillet, cut into 4 oz portions with pin bones removed (our fillet was enough to yield 4 portions)
1/2 head of fresh romaine lettuce, roughly torn into bite size peices
fresh peaches - 1/2 peach per person, quartered
fresh heirloom tomatoes - 1/2 tomato per person, quartered
fresh cherry tomatoes - 4-6 per person
fresh goat cheese - 2 T per person
1/2 red onion, sliced into strips
1/4 C olive oil
kosher salt for seasoning

Salmon Rub:
2 T brown sugar
1 tsp kosher salt
1 tsp black pepper
1/2 tsp cayenne pepper
1/2 tsp dry mustard

Basil Vinaigrette
1 C fresh basil
1/2 C olive oil
1/4 C sherry vinegar
1 tsp honey
pinch of salt

Heat coals until covered with ash, (or heat propane grill to medium). 

Make the basil vinaigrette by adding all of the salad dressing ingredients to a blender and pulse until well combined. Chill in the refrigerator.
Brush each salmon fillet with olive oil to coat top and bottom. Rub top of each filet with salmon rub. Place each filet onto the grill, skin side up. Leave them for about 3 minutes, then flip so that the skin is now touching the grill. You should see nice grill marks on the top. Cook until the salmon is opaque all the way through. This should take about another 4-5 minutes for fillets that are about 1/2 -3/4 inch thick. For larger fillets--1 inch thick--total grill time should be right around 10 minutes.
Remove the fillets and set aside.
Brush the tomatoes and peaches with olive oil and season with salt. Place the tomatoes and peaches onto the grill. For cherry tomatoes, I use a grill basket. Leave on the grill for 3-5 minutes, then turn, trying to get grill marks on each side of the fruit. 
Remove from the grill. Place salmon on each plate. Place a bed of romaine lettuce next to it, topped with 2 pieces of the heirloom tomatoes, 2 pieces of the grilled peaches, and a handful of cherry tomatoes. Sprinkle with goat cheese and red onion. Drizzle both the salad and the salmon with the basil vinaigrette, and dig in!