Sunday, June 30, 2013

Lavender Raspberry Jelly

Since we've had a long, cool, wet Spring, our garden has given us a ridiculous amount of raspberries. We've had them in cereal, dessert, and dinner, so it's officially time to start preserving them for later. While I like raspberry jam, (and do make it for my husband) I am really  not a huge fan of the seeds. So, when I went outside recently after a nice "dump" of rain, I caught a whiff of both my raspberries and my lavender, and realized that nature had given me a great idea, and let me tell you, it tastes great.

Lavender Raspberry Jelly
Ingredients
10 C fresh raspberries
7 1/2 C sugar
8 sprigs of fresh lavender
2 pouches of liquid pectin
8 jelly jars with rings & lids, sterilized

Heat berries and lavender in large sauce pot over medium heat while crushing to release their juices. Bring to a boil. 
Remove from heat, and pour into a food mill set over a large bowl.
Make sure your food mill is set to use the disk with the finest attachment screen to ensure that no seeds pass through into the jelly. Caution: make SURE to wear an apron. This stage can often look like a crime scene that you don't want permanently commemorated on your clothes.

Measure 4 cups of juice (depending on your berries, this should be about what you get) and return to a clean pot on the stove, again, over medium heat. Add sugar and pectin and bring to boil. Remove from heat, skim any foam from the top, and pour into your jelly jars, leaving 1/4 inch of headspace. 

Process in a boiling water canner fully submerged by 1-2 inches of water, for 10 minutes. After the jars have cooled, check the jars' seals by pressing the middle of the lid. If the lid springs back, it is not properly sealed, and should be stored in the refrigerator. 


Wednesday, June 19, 2013

Bacon, Eggs & Greens for Breakfast

This is a serious, stick-to-your-ribs breakfast and melds two of my favorite flavor combinations-- bacon, tomato and chives, and pumpernickel, eggs and dill. Put them all together with a whole lot of fresh greens from the garden, and it is an out of this world, uber-filling breakfast. This recipe yields two servings. 

Bacon, Eggs & Greens for Breakfast
Ingredients
2 strips of peppered bacon, crispy fried and crumbled
1 T extra virgin olive oil
3 eggs
1 lb of greens (I used a combination of mixed kale)
1/4 C dried tomatoes (I used some that I dehydrated last summer, but you could use store-bought, sun-dried tomatoes
1/2 tsp Aleppo pepper
2 T minced dill and chives
2 slices pumpernickel bread
salt 


Wash greens and add to a large stockpot of boiling water. Simmer for 2 minutes. Remove from heat, strain and rinse under cool running water until no longer warm. Wring out extra water from greens. Add to a non-stick skillet (I used the pan I used to fry the bacon, with leftover fat drained.) Add olive oil,  greens and tomatoes. 
If you're a tomato grower, make sure to toss some in the dehydrator this summer. They come in super handy throughout the year, and sure beat the insipid tomatoes you'll find in your local supermarket.
Cover and simmer over low heat for 10 minutes until tomatoes are softened. Whisk eggs together in a small bowl, and add to the greens mixture. Add crumbled bacon and Aleppo pepper.
I swear I don't ONLY buy this brand because of the hilarious packaging, but it does help ;)

Meanwhile, toast the pumpernickel bread and set each slice on small plates. Stir and cook egg mixture just until barely cooked through. Top each slice of pumpernickel with half of the egg mixture. Top with fresh dill and chives. Makes breakfast for two.

Monday, June 17, 2013

Morel Souffle


I think I may be the only mother whose 12 year old, when asked what she wants for dinner, responds with morel souffle. Seriously, I have created a monster. I have to give her props though, she did spend many an hour picking these bad boys after hiking an equally long time. Souffles really aren't that hard though providing you have a stand mixer. If I had to whip egg whites by hand, I'd just make an omelette.

Morel Souffle
Ingredients
8 egg yolks
10 egg whites, (room temperature)
Nonstick spray
4 T breadcrumbs
6 1/2 T unsalted butter
3 1/2 T cake flour
1 C milk
1/2 C white wine
1 lb. morel mushrooms, sliced in half (no morels? Just substitute with the mushrooms you do have)
1/4 C scallions
1 tsp truffle salt (no truffle salt? Just use what you have, but the truffle salt does add a lot, so it's worth hunting down)

Preheat oven to 400 degrees. Prepare your souffle dish by spraying and coating with breadcrumbs. 
Heat 2 tablespoons of butter in a saute pan. Add mushrooms and 1/2 tsp truffle salt. Saute until nearly all of the liquid has evaporated. Add the scallions and saute for about a minute. Remove from the pan and set aside in a bowl.
In the same pan, add the remaining butter, and make a roux by whisking in flour for about 1 minute. Whisk in the milk and white wine in a steady stream until the sauce comes to a simmer (not a hard boil) and the sauce thickens. Add remaining truffle salt, egg yolks (one at a time), and the sauteed mushroom mixture. Set aside.
Whisk egg whites in a stand mixer on high until they're stiff, but not dry or broken.
Using a rubber spatula, slowly fold your egg whites into the mushroom mixture. Do not attempt to "mix" the ingredients. Spoon the mixture into the prepared souffle dish, and put into the preheated oven. Turn the heat down to 375 degrees, and bake for 45 minutes. Serve immediately

Asparagus Salad

Oh sigh...asparagus season is winding down. Kind of sad, but hey, at least that means that peas are right around the corner, right? To celebrate this delicious seasonal veggie, we're taking one more crack at it with a cold, lemony salad. 

Asparagus Salad
Ingredients
2 lbs of fresh asparagus with woody stalks removed 
1/4 C fresh-squeezed lemon juice
1/2 C extra virgin olive oil
1/2 tsp Dijon mustard
1 hard boiled egg
2 T minced fresh chives
2 T minced fresh parsley
1 tsp minced fresh tarragon
2 T salt for boiling asparagus
1/2 tsp Maldon salt

Bring a large stockpot of salted water to a boil. Add asparagus and cook for 90 seconds. Remove from heat, and drop the strained asparagus into a sink full of ice water to stop the vegetables from cooking. 
I was happy to find purple asparagus at the Farmers Market, but sadly, it only remains purple until it's cooked

Refrigerate the asparagus while you mince your herbs, and grate your egg (yes, I said grate your egg) but if you don't own a microplane, feel free to finely chop the egg or put it through a ricer. I just didn't have one. I was also pretty convinced that I could fake my daughter out, and make her think the grated egg white was cheese, but no dice.

Make a dressing for the asparagus by adding the lemon juice, oil, mustard, herbs and egg to a small bowl (I just used the measuring cup I used, which happens to be my Grandma's so I like to use it whenever I can.) 
Remove the asparagus from the refrigerator and place into the serving dish of your choice. Top with the dressing and a sprinkling of Maldon salt for seasoning and crunch. I do believe this salad tastes just like Spring should.


Thursday, June 13, 2013

Simple Breakfast: Raspberries and Cream on Oatmeal

Sometimes we just need a reminder to keep it simple, stupid. Sometimes, ingredients are so spectacular, fiddling with them too much just gunks them up. Case in point: fresh raspberries. Last year I was given a small start from a friend's raspberry plant. This year that little start grew into a heaving, healthy bush FULL of berries. Few things will ever rival the deliciousness of just-picked berries on top of an equally healthy-sized glob of fresh cream (or better yet, raw milk, if you can find it) on a bowl full of oatmeal. Wash it down with a piping hot cup of coffee, and you are starting your day off right. No recipe required.

Garlic Scape & Walnut Pesto

If you are a CSA subscriber, if you shop at your local farmer's market or if you grow garlic, you know that right now is prime garlic scape season. These pretty, curvaceous little shoots are abundant, vibrant in color and flavor, and therefore, a prime candidate for pesto "fixins". Because we're fans of using what is on hand, we've paired our scapes with walnuts, olive oil and parmesan cheese, all pretty darned accessible ingredients, and a nice counterpoint to the scapes' pungent, overt "garlickiness." Note: garlic scape pesto is NOT mild. If you're looking for a pesto with just a hint of garlic, this is not the recipe for you. Try a good traditional basil pesto instead.  But if you love garlic, and want to add a Spring-y punch to your pasta, sandwich or salad dressing, give this recipe a whirl.
FYI: scapes are only available in Spring from hard-necked garlic varieties

We used walnuts in our recipe, but you could certainly substitute what you have on hand. I bet hazelnuts (aka filberts) would be tasty too. 

Add your pesto to al dente pasta with a little extra pasta water--YUM!!!
Garlic Scape & Walnut Pesto
Ingredients

10 fresh garlic scapes
1/2 C walnuts
1/2 C parmesan cheese, grated
1/2 C extra virgin olive oil
1/2 lemon, juiced
salt

Add roughly chopped scapes, walnuts and parmesan to food processor. Pulse until well blended. While processer is running, slowly drizzle in olive oil and juice. Stop and taste. Season with salt to taste and thin with water if necessary. 

Tuesday, June 11, 2013

Morel Mushroom Spanakopita

My daughter is a Spanakopita fiend. While she'll pick through her salads like they're infested with bugs, she'll gladly put away a half pan of Spanakopita, taking in over a pound of greens in one sitting without batting an eyelash. So, needless to say, when I've got lots of greens, this is a great bait-and-switch technique to get the greens in the girl. Along the same lines, we are ALL huge fans of the elusive morel mushroom in our house, and any opportunity to feast on these rare finds is out and out gluttony. Sooo, after picking over two pounds of mushrooms on my way home from spending the day in the city with Alex, and finding that all of the greens in my garden went bonkers over the weekend, the concept was born--marry the two into one meaty, all-in-one-dish-dinner. Don't worry if you don't have access to morel mushrooms, by the way. Just use the mushrooms that you can find. 


Morel Mushroom Spanakopita
Ingredients

2 lbs. fresh greens (I used a combination of spinach and kale, but spinach is traditional)
1 lb. morel mushrooms, cleaned and roughly chopped
1/4 C olive oil
1 large onion, minced
3 garlic scapes, minced (if you don't have scapes, just use 2 cloves of garlic)
3 eggs, beaten
4 oz. cream cheese, softened at room temp.
8 oz. feta cheese, crumbled
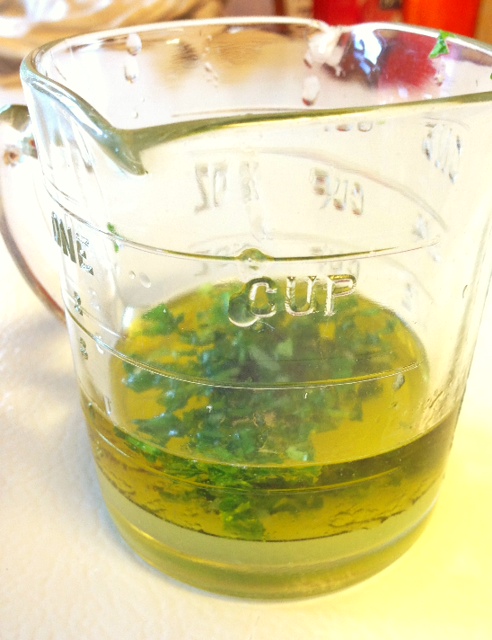
1/4 C chopped, fresh dill
1/4 C chopped, fresh parsley
1/4 tsp mace
1/4 tsp nutmeg
1 box of phyllo sheets, thawed
1/2 C melted butter
salt and pepper

Preheat oven to 375 degrees.

Thoroughly rinse and drain your greens. Bring a large pot of salted water to a boil. Drop greens into the boiling water and allow to cook for 3 minutes. Remove from heat, and strain into a colander under cold running water to stop the cooking process. 
Greens should be bright green 
"Wring out" your greens to remove as much excess water as possible. Roughly chop them and set aside. Heat olive oil in a large saute pan, over medium heat. Add onions and saute until translucent, add garlic scapes and saute for 3 minutes. Add mushrooms, and saute until all liquid is cooked out--about 8 minutes. Season with salt and pepper to taste. 

In a large bowl, combine cheeses, eggs, spices and herbs. Add chopped greens and mushroom/onion mixture until combined. Begin to layer phyllo sheets into buttered 9 x 13 baking dish, adding one layer of phyllo, brush with butter, add another sheet, brush with butter , and add another--3 sheets total. Add 1/3 of the filling and spread evenly over phyllo. Add another 3-sheet layer of buttered phyllo. Add second 1/3 of the filling. Add another 3-sheet phyllo layer, followed by remaining filling, and final layer of phyllo on top. 

Butter the top of phyllo and fold the edges inward, adding extra butter as needed. Bake uncovered for 20 minutes, or until golden and flaky. 

Remove from heat and allow to rest 10 minutes before serving.


Friday, June 7, 2013

Cherry Clafouti


Yesterday I started seeing the season's first Bing cherries arrive at my favorite produce market and along the side of the road. Rather than the joy it should have inspired, I started to panic about the massive bag of cherries that has resided in my freezer since last Spring. Believe it or not, those little guys had not a shred of freezer burn! Regardless, before I can permit myself to buy new ones, I have to make my way through last year's remaining stores. So, my first thought was Cherry Clafouti. I made my first rendition when my husband bought me Julia Child's series, Mastering the Art of French Cooking, a couple years ago, and that is still what I bake this recipe from, with a few slight alterations, not because they are better, but really, just out of pure of laziness and personal preference (I happen to prefer coconut oil to butter in this. Weird, I know. This dish put a just a small dent in the bag-o-cherries, but hey, it's a start.

Frozen cherries throw off a lot of liquid, so strain them before using.

Pitting your cherries can take a while, so do yourself a favor, and invest in a good pitter. Your fingers and your  teeth will thank you.

Cherry Clafouti
Ingredients
4 C pitted Bing Cherries 
3 eggs
1 1/4 C milk
1/3 C granulated sugar
1 T vanilla extract
1/4 tsp salt
1/2 C all purpose flour
Coconut oil for coating baking dish
Powdered sugar for dusting

Preheat oven to 350 degrees. Coat baking dish with coconut oil. I used a 9 inch oval casserole, but a Pyrex pie plate is really perfect. Place all ingredients except the cherries into a blender for 1 minute. Pour the mixture into the baking dish, followed by the cherries. Bake for about 1 hour, or until a a knife poked into the center comes out clean. Sprinkle the top of the clafouti with powdered sugar just before serving. I think it's best served after resting about 10 minutes. Don't worry that the clafouti settles--this is just part of the deal, and makes for the dense texture you want. In the words of Julia, "Bon Appetit!"

Thursday, June 6, 2013

Creamy Asparagus & Garlic Scape Soup


Right now asparagus is EVERYWHERE here. You'll find it in the regular grocery store from South America, or you can get smart and buy it from a farmer. I usually get mine from our local Farmhouse Table Store or the farmer's market, but this time, I bought it from a gal parked on the side of the road. I bought 10 pounds with which to make pickled asparagus for bloody Marys, but I wasn't thinking about the fact that these fresh stalks would be 12 inches tall, at least. When you make your pickled spears, you only use about the top 4-5 inches, so there was a whole lot of perfectly edible stalk in the middle, before getting down to the woody bottom. In this case, there was exactly three pounds, so soup seemed like the logical way to salvage a whole lot of produce. I added garlic scapes to the recipe just because they add a very mild garlic flavor, and honestly, it was a great way to use the whopping 3 scapes I had from my garden.


Creamy Asparagus & Garlic Scape Soup
Ingredients
3 lbs fresh asparagus, chopped into about 1-inch sections
3 garlic scapes, chopped1 large onion, chopped
3 T olive oil
6 C chicken stock
1/2 C vermouth
4 C water1 C heavy cream
1/2 lemon, juiced
chives for garnish
salt & pepper 

Heat olive oil in a heavy soup pot on medium heat. Add onion and garlic scapes, and saute until softened, about 5 minutes. Add asparagus, and vermouth. Turn up heat to medium high until nearly all of the vermouth has cooked out. Add stock and water. Cover and reduce heat to low. Simmer for 25 minutes. Add cream and blend into soup with a stick blender. Add lemon juice. Combine and taste. Season with salt and pepper to taste. Serve with fresh chives.

Wednesday, June 5, 2013

Preserved Artichokes

Preserved Artichokes
Living in Central Washington, I pretty much never see fresh, locally-grown artichokes. I've had a couple friends who've proudly grown a few here and there, and while I'm taking a crack at it this year, my little guys are only about 8 inches tall. Any hope for uber-fresh, right off the stem artichokes, is way down the road, if I succeed in growing them at all. So, I was super excited while taking last weekend off to celebrate me and JM's anniversary, that I found fresh baby artichokes at a farm stand down the road from where we were staying. Hooray for Horse Drawn Farms on Lopez Island! I bought all that they had with the intent to preserve them. Artichokes are my daughter's favorite veggie, and while there wasn't a ton, there was enough to work with.

Baby Artichokes from Horse Drawn Farms, Lopez Island, WA
Preserved Artichokes
Ingredients
6 lbs fresh baby artichokes
6 cups white vinegar
1 tsp salt
2 T black peppercorns
1 T chili flake (I used some leftover from last year's dried Thai chilis)
4 cloves garlic, minced
12 small sprigs oregano or other fresh herbs
12 short, wide-mouthed half-pint jelly jars with lids and rings, sterilized
extra virgin olive oil 
1/2 small bottle of lemon juice

Start by thoroughly rinsing and brushing off each artichoke. Set aside a large bowl of cool water with lemon juice added. Prepare each artichoke by peeling away tough outer leaves until the heart or pale green inner leaves are exposed. Trim stem. Cut off top half-inch of artichoke. If the artichoke is slightly larger, cut in half. If the larger artichoke has the "blossom" or fuzzy flower interior, scoop it out with a spoon and rinse before adding to the lemon water.
Watch for painful thorns--these guys smart!


Bring the pickling liquid to a boil: vinegar, pepper and salt. Strain artichokes and add to the hot pickling liquid. Cook for 10 minutes. Remove from heat and add artichokes to jars. Add chili flake, garlic and oregano to each jar, followed by brine and a topping of olive oil. leaving a half inch of head space. Wipe rims down, and seal with lids and rings. Add to boiling water canning kettle for 15 minutes. Let cool at room temperature.


Monday, June 3, 2013

Holy Timpano

Timpano

Last week I had Monday off for Memorial Day, and I fully intended to go hiking-to get out, breathe some fresh air and walk off some of the shortbread from the previous day. But nope, that wasn't in the cards. The skies opened and poured up again (great for the garden but bad for my plans) so after a whirlwind of much overdue "deep cleaning" in the house, I found myself parked at the table looking through an Italian cookbook I'd been given a couple years ago. I didn't find much I could make with what I had on hand, but it did give me an idea.

I had some extra time (pretty much never happens without somebody having a fever) and I had the lion's share of the ingredients I needed. I could make Timpano (you know, that crazy pasta dish they made at the dinner in the movie Big Night.) So, I traded in my cookbook for my laptop, and started looking at all manner of recipes for this monster pasta dish online, and cobbled together this recipe, which, if I do say so, turned out pretty darned good. Note: from beginning to end, the entire process took me about four hours, so schedule accordingly.


Timpano
Ingredients
Pasta Dough
2 cups flour (I used 1 cup of emmer flour and 1 cup of all purpose, but all AP flour would be fine.)
1/2 teaspoon salt
3 eggs, beaten
1 T olive oil
1 T white wine


Meatballs
1 pound ground beef (I used bison because that's what I had)
1 pound spicy Italian sausage
1 egg, beaten
1/4 grated parmesan
1 cup chopped, fresh parsley
1 cup bread crumbs
1/2 tsp salt

Sauce
1 jar of marinara 
1/4 cup of fresh oregano (normally I would use basil, but at this time of year, it isn't "in" yet, and oregano was)
1 medium carrot, chopped into half inch dice
1 stalk of celery with the leaves, chopped into half inch dice
1 medium onion, chopped into half inch dice
4 cloves of garlic, minced
1/2 cup white wine
1 T tomato paste
salt & pepper to taste

The Rest
1/2 box of mini penne pasta, cooked al dente, drained and cooled
3 eggs, hard boiled and quartered
1/2 lb. fresh mozzarella
1/2 lb. thin sliced salami
Olive oil for sauteing, and for coating baking "dish"

Make the pasta. Combine your dry pasta ingredients in a medium bowl with a fork. Add remaining liquid ingredients and whip together with a fork, and finally combining by hand. Transfer to a clean, floured surface and knead for 10 minutes. Let the dough rest, wrapped in plastic wrap, at room temperature for an hour. 

Make the meatballs. Combine all of the meatball ingredients. Roll out all of the mix into 1-inch meatballs. Swirl olive oil into a large, non-stick pan over medium heat. Add meatballs to pan. Brown on all sides, rotating pan periodically, until meatballs are cooked through, about 20 minutes. Remove cooked meatballs and set aside in bowl. (I always set a few aside to freeze for a future gift to self: meatball sandwich :)


Make the sauce. Add another swirl of olive oil to the "meatball pan." Add all of the vegetables except the garlic. Saute until they appear to soften, about 6 minutes, stirring periodically. Add garlic and continue to cook for another 3 minutes, stirring regularly. Add tomato paste, and cook for another 2 minutes. Add wine and raise heat to medium high. Cook until almost all of the wine is gone. Add the marinara sauce. Stir, and reduce heat to low. Let it simmer for 45 minutes uncovered. Add oregano, taste and add salt to your preference.


Build your timpano. Preheat oven to 350 degrees. Oil your baking pan or large, stainless steel bowl. I used my risotto pan which is about 12 inches across and 5 inches deep. Roll out pasta dough on a clean, floured surface into a thin, round sheet. Place over your baking dish, and allow to "form fit", leaving at least a few inches of overhang. Layer into the timpano: a third of the penne, then a third of the sauce, then a third of the cheese, then a third of the meatballs, and hard boiled eggs. Repeat with remaining pasta, sauce, meatballs, cheese and eggs. Cover all with sliced salami. Fold the edges up over the salami. Cover with foil and bake covered for 45 minutes. Uncover, and bake another 45 minutes. Remove from the oven and allow to rest 10 minutes. Cover with a large plate, and invert, removing the baking dish. Ta da-timpano!


\\