Sunday, November 24, 2013

Truffle-Baked Eggs

Sunday mornings are by far my favorite time of the week. I sleep in past 7 a.m., I have no lessons to rush kids to, and most significantly, I have TIME. While I love a huge bacony breakfast as much as the next gal, sometimes a fruit smoothie and something small, but rich and delicious is just the ticket. (While I dream of the day I can plop some clunky, freshly-shaved truffles onto my eggs, until then I am pretty satisfied with the truffle oil/truffle salt combo.) Eggs Benedict or Cheese Blintzes would also fit the I-really-really-need-a-decadent-breakfast bill perfectly, but going back to another reason I love Sunday mornings, I get to be lazy if I so choose. Baked eggs are fast, (perfect for feeding a group), and allow one enough time in the rest of their morning to catch up on a little magazine reading, some knitting and maybe even a quick hike. That said, I'm out of here...

Truffle-Baked Eggs

Ingredients
3 fresh eggs
3 tsp truffle oil
1 T extra virgin olive oil 
1 T butter
3 T heavy cream
1/2 tsp dried thyme
1/4 C morel mushrooms, sliced (no morels? substitute minced white mushrooms)
1/2 shallot, minced
3 T bread crumbs (I prefer fresh, but you can make it easy on yourself and use store-bought)
1/2 tsp truffle salt

(makes 3 servings)

Preheat oven to 375 degrees. Place 1 tsp of truffle oil in each ramekin, coating bottom and sides. Heat a medium, non-stick saute pan over medium heat. Add 1 T olive oil until warm. Add shallots and cook until golden-brown, about 5 minutes. Add mushrooms. Season with truffle salt and thyme. 
Saute for another 5 minutes. Add butter. When melted, add bread crumbs, stirring well. Cook for another 5 minutes, or until the bread crumbs are golden brown. Remove from heat and set aside.
Bring a tea kettle to a boil. Place oiled ramekins into a baking dish. Pour boiling water into the baking dish, making sure that the water is about one inch high on the ramekins.
Pour 1 tablespoon of cream into the bottom of each ramekin. Follow with one egg in each ramekin, taking care not to break the yoke. Sprinkle the mushroom-shallot-breadcrumb mixture over the top of each ramekin. Bake for 12 minutes.

Tuesday, November 19, 2013

Pasta Ragu in a Pecorino Cheese Bowl

I LOVE pasta and pasta sauce. I love the texture of the noodles. I love the flavor the noodles, and most significantly, I love, love, love pasta sauce. Because I love pasta so much I tend to make it a whole lot--I'd say about once a week. When you make a dish once a week, you really do have to switch it up every so often if you (A) don't want to get sick of it, and (B) if you want to get away with continuing to serve it over and over without boring whomever you are cooking for (in my case, my husband and daughter. My son would never get sick of it providing it was brimming with meat, which this dish is.) Also, because the sauce is so entirely loaded with meat, and because I'm serving it in a cheese bowl, I tend to make the bowls on the small side. The dish is delicious but very rich, so plan to serve it with a lightly-dressed green salad. Give it a whirl!

Ragu
1 lb spicy bulk Italian sausage
1 lb ground brisket
4 T extra virgin olive oil
1 shallot, coarsely chopped (I only use shallot because of its ability to "dissolve" in foods. 1/2 of a large onion is perfectly fine, and actually more traditional)
1 C carrots, coarsely chopped
1 C celery, coarsely chopped
1/2 green bell pepper, coarsely chopped
1/2 red bell peper, coarsely chopped
1/2 lb. white button mushrooms, coarsely chopped
2 C red wine (I used Cabernet Sauvignon, but anything you wouldn't mind drinking is good enough to create a delicious sauce.)
2 C beef stock
1 quart jar of tomato sauce (I use the stuff I made, but you could use whatever you prefer from the market if you didn't get to make yours)
1/2 tsp salt
1/2 tsp dried oregano

Pasta
1 lb dried pasta, cooked according to instructions (I used rotini, but you could use whatever type you prefer)

Cheese Bowl
I make small bowls that hold about 1/2 - 3/4 C of pasta and sauce. If you want larger bowls, use a larger pan and quantity of cheese.

Small Bowls
1/2 C Pecorino or Parmesan Cheese, finely grated, per person

Large Bowls
1 - 1 1/2 C Pecorino or Parmesan Cheese, finely grated , per person

Make the sauce. 
Start your sauce about 4 hours before you want to eat. Heat 2 T of oil in a large sauce pot over medium heat. Add your chopped vegetables and cooked until they are softened and browning around the edges. 
Remove from pot and set aside. Add remaining olive oil and warm. Add sausage and ground meat. Cook until well-browned. Return the cooked vegetables to the pot. Increase heat to high. Add wine and stock. 
Cook, stirring regularly, and reduce by half. Add the tomato sauce, salt and oregano.  Reduce heat to low, cover and walk away. (I recommend catching a yoga class.)

Make Cheese Bowls
In about 3 hours, warm a non-stick pan over medium heat. Because I was making small bowls, I used a small omelet pan. If you are making larger bowls, use a larger pan. Sprinkle cheese in an even layer in a circular shape. 
Allow to cook for about 1-2 minutes, or until the edge curl slightly. Using a small spatula, lift the edges first, and then, the entire disk. Immediately place over the bottom of an inverted jelly jar for smaller bowls, or if you want a larger bowl, just place over a bowl that is the size you want to use.  
Set aside and allow to cool. (Do not overcook the cheese bowls or they will become brittle and break, rather than bend to your desired shape.)

Make Pasta
I made rotini because I like the way the sauce gets stuck in its ridges, but you could make whatever pasta you prefer. I would just say that the shorter pastas hold thick, meaty sauces better. Make the pasta according to its instructions, adding the strained pasta to the pasta sauce. 

Assemble
Place the cheese bowls onto individual plates, and spoon the pasta and sauce into each "dish." Serve immediately and make sure to give each diner a knife too!


Monday, November 18, 2013

Vegetable Chips

While I might periodically feel compelled to nosh down a hunk of chocolate (or more likely, a piece of pie) I'm really more of a fiend for salty snacks. Nope, these really aren't the best things in the world for me, but ya know, sometimes it's just going to have to happen. Homemade veggie chips are my answer to this craving. They may be fried, but at least they are fresh, and made out of veggies that either I or one of the growers at our Farmers Market grew.  These are a great snack, or a side dish for a "sandwich dinner." My family digs them. Perhaps yours will too.

Veggie Chips

Ingredients
1 large red potato
1 large parsnip
1 large carrot
2 large beets
peanut oil for frying (buy enough so that the oil is at least 2 inches deep in your pot, but has lots of "bubble room." You don't want this stuff splattering up and over.)
salt for seasoning
* Want to make these extra addictive? Add 4 T of truffle oil to your peanut frying oil, and replace the salt for seasoning with truffle salt. Hoooooly moly is that good!

Heat peanut oil in pot over medium-high heat until it reads 350 degrees. I use a clip-on candy thermometer. (If you happen to actually own a deep fryer, by all means use it ;)

Using a mandoline, slice your vegetables as thinly as possible. If you don't have a mandoline, use your sharpest knife, but know you are looking for paper-thin slices that are as evenly cut as possible. Place your vegetables on paper towels while the oil is heating. Blot with towels as thoroughly as possible to remove as much wetness as you can. (The wetter the veggies, the more spattering.) 
 
Place a large colander over a large bowl. Line the colander with paper towels. Set this near your frying area so that as you remove your chips, you can put them into the colander to drain and cool.

Once the oil has reached 350 degrees, add your first batch of vegetables. Be care to lower them gently into the oil, scattering them loosely. Swirl in the pan periodically to help them cook evenly, and to avoid having them stick together. Cook each batch for approximately 2 minutes, or until they are lightly browned and crispy. 
Do not overcook or they will be bitter. Remove from the pan, and place in the colander. Season with salt. Allow to cool while you place the next batch in. Once the next batch is ready, remove the batch that is cooling in the colander and place into a large bowl. Repeat with all of the vegetables. Enjoy!


Salmon Burgers with Garlic Aioli


While I spent probably the first thirty years of my life fixating on my weight, I've spent the past decade trying to focus on my health instead. I tried to make choices that would help me avoid heart disease, stroke and diabetes (I spent my childhood trying to convince my diabetic mother to put the Hershey bars down) but didn't concern myself too much with anything else. I quit smoking four years ago, and have really tried to remain as active as my schedule would allow--getting as much fresh air, and "natural exercise" as I could. As of recent, however, it seems I spend more and more time watching friends and family try desperately not to slip off the proverbial raft, and cancer has by far, been the culprit trying to kick them off.

It feels like wherever I look--be it the internet, magazines, bookshelves--everybody has a theory about what is causing cancer, how to avoid it and what, (most often) you should buy. I'm left scratching my head. What reverberates most lately though, is the voice of my grandmother telling me "everything in moderation", "if it doesn't go bad on the counter, it's probably going to go bad in you", and "if you can't control it, then you can't be bothered with it." She was such a wise woman, and she happened to live to 101 years old.

Now, following this advice as much as I can, I am giving up nothing, but moderating everything. I try to grow and prepare as much of my family's food as I can, but know that I can't do it all. When I can't, I try to buy locally-sourced, organic, non-GMO foods when possible. Last night I wanted a cheeseburger and fries wayyyy bad, BUT I knew this not the way to go. I also happened to have a bin full of root veggies from the garden and a cupboard full of salmon that I CAUGHT in Alaska, and that my brother-in-law canned for me. So, I made this, and I have to say, I was entirely satisfied, and then some.

Salmon Burgers with Garlic Aioli

Ingredients

1/2 can salmon (I used a smaller can of homemade, but this works too)
3 T fresh bread crumbs
3 T feta cheese
1 egg
1/2 tsp salt
zest of 1 lemon
1/2 tsp dried thyme
2 brioche buns (I just bought these)
1 C fresh arugula
2 T extra virgin olive oil
2 T garlic aioli
(makes enough for 2 burgers, so just multiply the recipe as needed for larger groups)

Garlic Aioli (I just use the Vitamix recipe. It works perfectly!)


Make the garlic aioli first and refrigerate until ready.  Add first 7 ingredients to a medium bowl.

Combine ingredients with a fork. There is no need to overwork this.
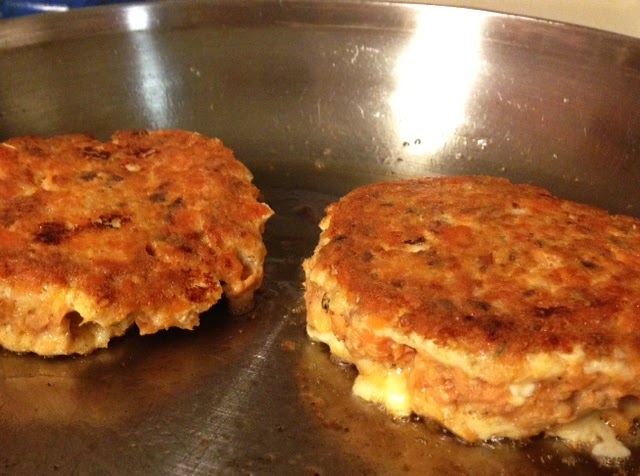
Heat olive oil in a pan over medium heat. Form burgers (I like mine about 1/2-3/4 inch thick) and add to the pan. Do not move them, allowing them to form a crust. This should take about 4-5 minutes. Flip and repeat. 
In the meanwhile, spread aioli on each side of the bun and top with a handful of fresh arugula. Remove the burgers from the pan and add to your prepared bun. This is great served with homemade veggie chips. Enjoy!


Tuesday, November 5, 2013

Celery Apple Soup

While there are all sorts of folks out there whose gardens are put to bed nicely--expired plants dug up and composted, soils amended, and weeds pulled--my garden is a creepy scene. Plants are sagging, fruits are dropping, and bits of mold can be found here and there. All in all, there is a noticeable funk in the air. I am practicing extreme avoidance. On a daily basis, I tiptoe past the crime scene (frosts started happening last week) and move on past to where a few viable, fall-hardy edibles still exist. I WILL go out and work in the garden eventually. For now I'm wallowing in the funk as one season moves into the next. I think there is a time and place for everything, and right now my garden just gets to be how it is, warts and all.

Because I am clearly a lazy bum right now, I am not cooking complicated dishes. I want fast, healthy food that leaves me feeling better than when I started--part of that process is of course, how the food tastes (delicious) and the other is how it looks (bright and cheerful). What can I say, I'm a sucker for the aesthetic, at least when it doesn't come to my Fall garden.
Yes, there's a ladybug on the celery, but no, she didn't go into the pot
Celery Apple Soup
5 C celery (the more leaves the better), chopped
1/2 large white onion, chopped
2 large baking apples such as Cortland, Gravenstein or Macintosh if you can find them, peeled, cored & chopped
2 T coconut oil
1 can organic, unsweetened, full-fat coconut milk
4 T long-grain white rice
1 32-ounce box organic vegetable stock
1 tsp Madras curry powder
1 tsp ground ginger
1 tsp ground turmeric
1 T sea salt
juice of 1/2 lime

Heat oil over medium heat in large soup pot. Add the onions, apples and celery. Saute for approximately 10 minutes, or until all are soft and translucent. 


Add the salt and spices and allow to cook for another 5 minutes, stirring regularly. 


Add the coconut milk, vegetable stock and rice. 

Cover and reduce heat to low. Allow to simmer for 15 minutes, stirring periodically. Either pour the mixture into a blender and blend until completely smooth, or use a stick/immersion blender and blend in the pot until completely smooth. 


Cover and simmer for another 5 minutes. Add the lime juice, taste, and season with salt and/or hot sauce to taste.

Monday, September 9, 2013

Italian Plum Custard Pie on Hazelnut Crust

The bad news: this month has been really, really hard. the good news: I can make pie. Lots and lots of pie. Some people deal with their struggles by going to church, running for miles on end, or cleaning their houses from top to bottom. Me, I like to make pies. I'm a lucky person. I live where produce is abundant, and I have in-laws with the most beautiful Italian plum tree that they graciously allow me to pick when the fruit is ripe. I love it. 


Climbing up their ladder to pick the top of the tree (I don't have to, but I like to) reminds me of picking cherries in 7th grade with my sister when we hadn't lived in Washington long. It was a grind at the time--seriously early mornings--I was terrible at it, I was lazy, and didn't do it long at all--but we really did have fun.  I picked that plum tree last week and brought the bag home and did nothing but look at it for days. I felt sad. I made some chutney and canned a whole gaggle of jars. I still felt sad. And then I made this pie, which made me feel a little better. I think I'll have some more tonight and feel even better. Got a little time? You might take a crack at it, your heart might just feel a little lighter like mine did.

Italian Plum Custard Pie on Hazelnut Crust

Ingredients:
Crust & Topping
1/2 C hazelnuts, shelled
1/2 C brown sugar
1/2 tsp nutmeg
1/2 tsp salt
1 1/4 C all purpose flour
3/4 C unsalted butter, chilled and cut into domino-sized chunks

Filling
1 lb. Italian plums, pitted and quartered
1/4 C granulated sugar
2 T all purpose flour
1/4 C heavy cream
1/4 C whole milk
2 eggs
1 tsp vanilla
1/2 tsp salt

Preheat oven to 350 degrees. Place a heavy sauce pan on a burner over medium heat. Add the hazelnuts. 

Shake the pan back and forth every few minutes for around 5 minutes, or until the hulls begin to come off, and they begin to smell delicious. Remove from the heat and allow to cool until you can handle the hazelnuts without burning yourself. 
This will take around 10 minutes. Remove all the hulls and add to a bowl of a food processor. Combine with all dry ingredients and pulse a couple times. Add the butter, a few pieces at a time and pulsing until the dough looks crumbly, but combined. 
Take about 1 1/2 C of the mixture and press into a pie plate. 
Place in the oven and bake for 15 minutes. Remove from the oven and set aside to cool.

Rinse, pit and quarter the plums. 
 
Pour into the cooled pie shell. Combine remaining filling ingredients and whisk together. 
Pour over the plums in the shell. Top with remaining crumble mixture. There may be some extra depending on how thick you made your pie crust. 
Place on a baking sheet and bake for 55 minutes.


Saturday, September 7, 2013

Pizza for 4


Late summer/early Fall is peak season for tomatoes and basil-perfect fodder for homemade pizza.It's also time for wild mushrooms such as chanterelles, corals, lion's manes and boletes to start poking out, also great pizza fixin's. No access to wild mushrooms? Don't give it a second thought. Use what you have--that is precisely the point.

Ingredients:
Pizza Crust
2 tsp dry active yeast
2 tsp honey
1 1/2 C whole wheat flour
1 1/2 C all purpose flour
2 tsp salt
1 1/4 C warm water

Wild Mushroom Pizza Toppings:
1 pound wild mushrooms, cleaned and sliced (if you can't find wild mushrooms, feel free to use what you have)
1/4 lb. Manchego cheese, torn into chunks
2 tsp Aleppo pepper--1 tsp per pizza (No Aleppo pepper? Substitute cayenne and decrease amount by half)
1 fresh sage leaf
1 tsp truffle salt
1/2 large onion, diced
2 T unsalted butter
2 T Extra virgin olive oil

Tomato Capicola Pizza Toppings:
1 lg. tomato, cut into 1/2-inch slices
1/4 lb fresh mozzarella, cut into 1/2-inch slices
6 pieces Capicola, cut into paper-thin slices (No capicola? Just substitute pepperoni or salami)
2 T extra virgin olive oil
2 garlic cloves, minced
1 C fresh basil, torn or shredded for topping

2 T extra virgin olive oil and corn meal each, for prepping baking sheets
4 T extra virgin olive oil--1 T per pizza
2 T extra virgin olive oil for bowl for dough proofing

About 3 hours before you want to eat, add yeast and honey to 1/4 C warm water to make a sponge. Stir and cover with a towel. Leave for 15 minutes until foamy. 
Mix flours and salt in a large bowl. 
Create a well in the center. Add remaining warm water to the sponge. Pour into the well in the flour. Stir with a fork to combine roughly. Rub a little oil on your hands and knead the dough into a pliable ball of dough. This should take about 5 minutes. Coat a large bowl with olive oil. Place the dough into the bowl and cover tightly with plastic wrap. Place into the oven until the dough is at least doubled. This should take around 3 hours.
While the dough is rising, prepare toppings for the mushroom pizza. Heat a saute pan over medium heat. Add the butter until melted. Add the onions and stir often until they are amber colored. 
Remove to a bowl. Mince the fresh sage. Return the pan to the stove. Heat the olive oil. Add the mushrooms and sage. 

Season with truffle salt. Cook, stirring periodically until all liquid has cooked out. This will take around 15 minutes. Cook until slightly browned. Remove to a bowl. Next, prepare toppings for the tomato capicola pizza. Slice tomatoes and set aside. Prep basil and cheeses. 

When the dough is ready, remove the bowl of dough from the oven. Heat oven to 450 degrees. Punch down the dough and recover with the plastic while you prep the baking sheets. Oil each sheet and sprinkle with corn meal (this helps the dough not to stick.) Cut the dough into 4 pieces. Press each piece into a round as thin as you can make it. Coat each crust with oil. 

For the two mushroom pizzas, add the mushrooms first, followed by the onions, and pepper. Top with the Manchego. For the two remaining pizzas, add the cheese, tomato slices and capicola. Sprinkle the garlic over the top. 

Bake the pizzas for 8 minutes. Switch the heat to broil. Broil for 2 minutes and remove from the oven. Allow to rest for 5 minutes before cutting. Top the tomato pizzas with the fresh basil. Enjoy!


Tuesday, September 3, 2013

Watermelon Feta Salad

Summer is literally blowing by--I can see it right outside my window. Leaves aren't turning quite yet, but the breeze is picking up and leaves are looking crispy. It's time to take stock of an outstanding season and eat the full-tilt summer foods like mad before they're gone. In my mind, watermelon and tomatoes are two foods that just should only be eaten fresh when in season. What you find in the market off-season are sad, mealy, flavor-free impersonators that should be avoided. Watermelon, also like the tomato, is a good delivery system for lots of flavors and textures, which is why I love it in salad, particularly when lots of other great goodies are in season too, like fresh local feta (bet you didn't think I was going to say cheese, did you?) It's sad to think we won't see them again for another year, but I suppose that's part of what makes them so delicious. I love this salad for lunch with some toasted naan and Baba Ghanouj

Watermelon Feta Salad
Ingredients:
1 watermelon, seeded and cubed into chunks no larger than 1-inch
1 C basil leaves, torn
8 oz. feta
1 medium red onion, chopped coarsely
1/4 C white balsamic vinegar
1/4 C extra virgin olive oil
2 fresh red chiles (I used Thai chiles, but you could use cayenne or dried Aleppo Peppers)
Salt to taste

Mix the dressing by combining the vinegar, oil and minced chiles. 
Combine all remaining ingredients in a large bowl and gently combine with the dressing. Season with salt to taste. Enjoy!


Friday, August 16, 2013

Super Easy Pasta Sauce

I don't know about you, but I cannot stand to buy pasta sauce when you look at the ingredients list and find things like corn syrup, sugar, "natural flavorings", and soybean oil. The price doesn't bother me, but the weird ingredients and sad flavor do. Sooo, when I started my wee little garden a couple years ago, growing tomatoes became serious business. Each year I've started seedlings for paste tomatoes, cherry tomatoes and heirloom varieties. The paste tomatoes are an absolute must I learned, because without them the sauce is more like soup, and after boiling the soupy sauce down, the fresh flavor is cooked out and replaced with something pretty acidic and bitter (which is probably why commercial sauce relies on the addition of sweeteners and "natural flavorings.") 

Every year I try to grow paste tomatoes, and each year so far, I have failed, winding up buying the pretty, pear-shaped beauties from local growers. Thankfully I've been buying from them long enough that I can get a really fair price. Cherry and heirloom tomatoes are also essential because both offer their own huge, fruity, tomato-y flavor that paste tomatoes don't provide. These guys have been pretty simple to grow, with each plant delivering tons of produce. Don't worry though, you really don't have to grow these if you aren't so inclined. Hop down to your favorite produce market (I love our local Farmhouse Table Store) or your local farmer's market (I'm also a big fan of ours) to pick up what you need. This recipe is just for simple tomato sauce (Pomodoro), but you could certainly add seasonings, herbs, etc. when you serve fresh. (I don't can mine with lots of extras because I like to avoid pressure canning when possible for no reason other than pure laziness.)

Super Easy Pasta Sauce
Ingredients:
10 pounds paste tomatoes, halved
5 pounds cherry tomatoes (I use Sun Gold and Sweet 100's)
5 pounds heirloom tomatoes, quartered (I use a mixture of Black Krim, Cherokee Purple, Mr. Stripeys and Brandywines)
1/4 C extra virgin olive oil
6 T lemon juice*
3 tsp salt*

*these are only needed if you are going to can your sauce up. If not, the sauce can be served immediately, as-is, or with the seasonings and additions of your choice.

Preheat oven to 325 degrees. Take two large baking sheets and add half of the olive oil to each sheet. Divide the tomatoes evenly among the sheets and place into the oven. 
 
Walk away and find something else to do. Come back in 2 hours and rotate the cookie sheets. Walk away again. In another 2 hours, remove the baking sheets from the oven. The tomatoes should look slightly charred around the edges, with little to liquid remaining. 
Run the mixture through a food mill to create a thick sauce. 
If you are canning, fill sterilized quart jars with the sauce, 2 T of lemon juice and 1 tsp of salt, leaving 1/2-inch of head space at the top. This should yield 3 quart jars, depending on your tomatoes. Process in a boiling water canner for 40 minutes.